Sunday, July 26, 2015

$12 Framed Canvas

Most of you know that Scott and I have officially jumped ship and moved to a larger apartment. Besides the moving and unpacking (bleh), we are so excited to call this new place home! And of course, as usual, I'm just excited to decorate and finally breakout all of the crafts I have been storing away for the perfect opportunity! 

Have you ever seen the black and white framed canvases? I have, they're amazing and I've probably pinned a dozen examples of them. Little did I know that you can't find any for less than $200! (I wanted multiple and each to be at least three feet long). My husband would KILL me if I spent that much money on a canvas - plus I couldn't even let me self do it. How ridiculous! 

I needed another solution! I headed over to staples and ordered two large engineer prints. The staples by us offered three different sizes, I opted for the medium which was 26 inches by 38 inches. These were $3 a piece, ya'll! Talk about CHEAP! They do say that the quality is not recommended for photos, but for three dollars, I was willing to take the shot and they came out great! 

These prints are on extremely light weight paper, so you'll need to put them on something. I just picked up two black foam boards from my local craft store and honestly duck taped the prints to the boards (no judgement if it works!). I really wish I had taken pictures along the way but I wasn't planning on sharing my project until I realized how amazing and cheap these were! 

I could have left the pictures as is after that, but I really wanted a frame for the outside.  Did you know that large frames were so expensive?!? Apparently I didn't! This amazing alternative is really the reason I'm sharing this project. Seriously, you're about to be amazed! 
You can buy frame pieces at hobby lobby somewhere along the model airplane isles and the canvas isles. I had to really look for them. The pieces are the sides of canvas frames (they look like mini crown molding pieces). I grabbed the pieces I needed, fit them together in the detentions I wanted, and then fastened them in place with a staple gun. Seriously guys, this was $8 per LARGE frame! 
Paint or stain the frame however you want, and attached the canvas (I used the stable gun for this also... I love the staple gun), and you're done! I want to put these in every room of our apartment now, and you know what? I can since they're so cheap! 


Saturday, November 8, 2014

Quinoa Dark Chocolate Chip Cookies

I'm not sure if you've jumped on the quinoa bandwagon yet, but if not, it's about time you did! Lately Scott and I have been on a big health kick, and while I really enjoy it, a little bit of me cries inside for the sweets we used to eat. Okay, it's a little more than a cry. Anyways, back to the quinoa. It's a serious super food and is amazing for you. So, I've been experimenting with quinoa substitutions and recipes, and tonight, I hit ultimate perfection with quinoa dark chocolate cookies. YUM.

Not only do these actually taste like REAL cookies, but you don't have to feel guilty for scarfing down ten of them as soon as you pull them out of the oven. It's okay, we've all done it (Scott ate the first dozen out of the oven). But seriously, these puppies are packed full of protein!

I was skeptical of these at first too! The dough texture seemed strange and it definitely didn't smell like plain cookie dough, but trust me on this, you won't regret making these. In the end, these really did kick my craving for something sweet without ruining my healthy habits. Lucky for you, I've even included the recipe. ;)


Quinoa Dark Chocolate Chip Cookies 
_________________________________

Ingredients: 
  • 3/4 cup cooked quinoa 
  • 1/3 cup honey 
  • 1/2 cup almond milk 
  • 1 stick unsalted butter 
  • 3/4 cup coconut sugar 
  • 1 tsp sea salt 
  • 1 tsp baking soda 
  • 2 1/4 cups brown rice flour 
  • 1 cup semi sweet dark chocolate chips 
Instructions:
  1. Preheat oven to 350 degrees. 
  2. Add cooked quinoa, honey, almond milk, butter, and coconut sugar in a food processor (I honestly just used our magic bullet, but you could also use a blender). Blend on high until thoroughly combined. 
  3. In a large bowl, combine blended mixture with remaining ingredients. Stir well. 
  4. Place 1.5 dough balls on a cookie sheet and bake for 12-15 minutes. 
  5. Devour! 


Thursday, October 9, 2014

Scott's recovery + homemade noodles

While I spent a majority of my day yesterday blogging and pinteresting in a waiting room, my husband was on the other side of the wall having his broken nose reconstructed. Not a fun day, but he was a trooper and rocked the hospital gown.


Anyways, our household is in recovery mode, so I thought it would be the perfect time to break out the ultimate comfort food. Ever since I was little, my grandma has always made THE BEST homemade noodles; they were always the foodie highlight of every visit to her house. So, I decided to finally attempt these amazing noodles in a quest for comfort food. Although I had to text my grandma throughout the noodle making process, they turned out fabulous and Scott devoured them!


Ingredients: (2 servings)
2 cups white flour
2 large eggs
chicken broth (I used 3 of the 10.5 oz cans)
salt and pepper to taste

Directions:
Mix eggs and flour together until blended. These are fairly dry noodles so I had to get my hands a bit messy and kneed these until all of the flour was absorbed into the dough.

Roll out dough on a floury surface and cut into strips. I cut mine about 1/2 inch wide. Easy peasy.


Cook the noodles in the chicken broth. They should float to the top when they are finished, mine took roughly 30 minutes. They should look something like this:


 That's it! Serve over some mashed potatoes and you're in business!


There's nothing like a little comfort food to warm up your day and mood, especially as it gets colder outside!


Wednesday, October 8, 2014

3 Ways to Celebrate and Embrace Autumn


I have to admit, autumn is most definitely my favorite season. I love the mild chilly weather, I love the warm colors of the leaves, I love the pumpkins and lattes, I love it all! Thus, what a great thing to embrace and enjoy. Of course I wouldn't enter fall unprepared and without a Pinterest board ready to go. Lucky for you I'll share! Here are three things you should do to embrace autumn! 


1. Mason Jar Candles 


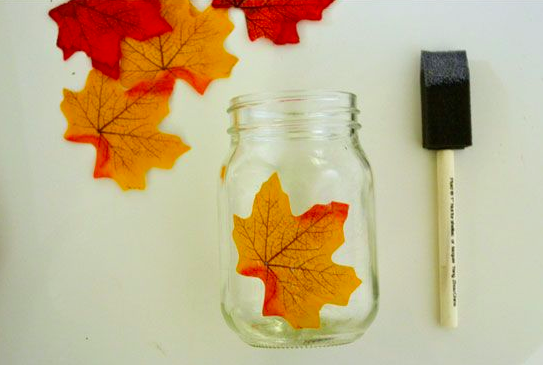
These are a little messy but oh so fun to make. All you need are: leaves (fake are best), a mason jar, hot glue or mod podge, and some kind of twine (optional) to tie around the top. Just use your creative self and get gluing! 


I have actually made these in the past and while they were uber cute and easy, don't make the mistake I did in using real leaves. While I don't have pictures to prove it, after a few days my leaves began to get crusty and fall apart leaving a gluey disaster inside my mason jar. 


2. Autumn Scented Pot 


I'm just going to be real with you, I live in a one bedroom apartment with my lovely husband and puppy which means whenever there is a scent or stench, you will without a doubt smell it throughout the entire apartment. This potpourri pot has been a lifesaver for me multiple times, although I never really follow a recipe, I just throw in whatever we have in the kitchen and hope for the best. You can find the actual recipe for the picture above here to fill your home with the sweet sweet smells of autumn. 


3. Glitter Pumpkins 


You've probably seen these on Pinterest before because they are freakin cute! Plus, you don't end up with a super mushy, smelly, half carved pumpkin on your doorstep two days after halloween. AND incase you miss putting candles inside your carved pumpkins to share your masterpiece with the night life of the world, Martha Stewart has a line of glow in the dark glitter that works perfectly with these. You can find instructions for the monogramed pumpkin above here


Just a few ways to spice up your fall this year! 


Home Sweet Home

Well, I have finally given in to the blogging peer pressure and now here I am, writing away for the world to read. The positive side of this is that I can now share all of the exciting changes in my life with everyone and man oh man do you guys have a lot to catch up on! 


It's been about three months since the wedding and it still feels like a dream, what a perfect day! On the day following our wedding, Scott and I loaded up all of our belongings (and those stollen from our parents, sorry!) and hit the road for California. Scott did the driving and I supplied the emotional support. We took a few detours and five days later we arrived at our home sweet home in Cali. Since then I have decorated our apartment like a crazed woman, bought out nearly all of target and home goods, and baked and crafted everything I can find on Pinterest, but can ya blame me?! It finally feels like home and I am LOVIN it! I can't wait for else comes our way in our newlywed lives, cheers to more adventures to come!